
Solar Powered Wifi Camera for Wearables or Outdoor Installation
I have had issues with pairing a Dropcam (especially when traveling and on hotel wifi, but also at home) and a friends foray into a wearable with the Pokepak both had video and wearables squarely on the mind.
Without knowing what I would mount it on I figured a wifi connected streaming camera would be a good component to have in the arsenal and a great place to start, bonus points if I could find a way to get it battery powered. A few additional devices, mostly giveaways from various conferences, along with the harness for a goPro mount let me combine the whole thing into a wearable streaming body camera. This was helped out by a handy battery pack solar charger which would let me consider moving it to a semi-permanent outdoor installation if I wanted to remove the “wearable”. The final part list of what is used:
- Raspberry Pi 3 ($35 from Amazon)
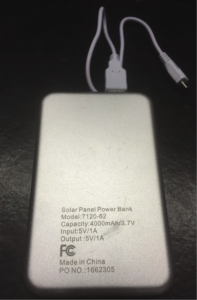
- Bask Solar Power Bank w/ 4000mAh capacity and 5V/1A output (branded by Solidworks) $35
- 8GB SD Card with Noobs ($8.99)
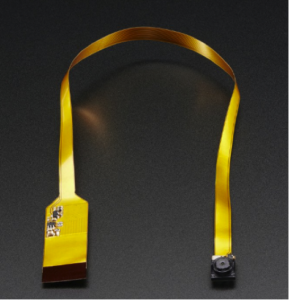
- 5MP Spy Camera ($39.95)
- goPro Head Strap ($19.95)
- Case (optional $6)
In total that comes to $140 ($105 if you consider the powerbank was free) but that is not optimized at all. There is probably $25 reduction from finding an alternate power bank, even when keeping the solar panel. A camera can be found for as low as $10 while the SD card price can be halved if you are willing to load the noobs image yourself. Even the goPro head strap can be replaced by a ballcap or the whole rig can be strapped to a hoodie so if you need to it’s possible to build this for well under $100.
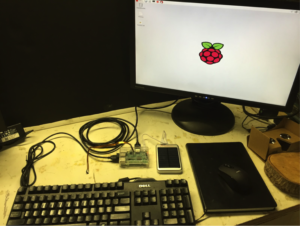
There was some work with additional items. Mainly I have a HDMI out cable, monitor, wireless mouse, and USB keyboard that allow me to fully connect to the Pi and get things setup. The Pi also typically sits in a $6 case just to keep it clean, this can be seen in the image..
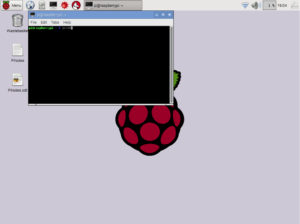
Setup Raspberry Pi for screenshots and connect to the Internet
There are a few things needed to get things setup. Thankfully the noobs card comes ready to go so Raspbian boots right away and has an intuitive interface for anyone who has ever seen a windows machine. At the top right of the screen is the classic internet icon, I simply chose my preferred wifi network and was online less than 2 minutes after plugging in the pi. It’s worth noting that here is where I was also using an external display (via the HDMI out), a USB mouse, and a USB keyboard.
I wanted to make sure I could document everything that I did and do things in steps to ensure I could troubleshoot things. One of the best ways to do that is with screen captures so I grabbed the Scrot.
 https://en.wikipedia.org/wiki/Scrot
Scrot is a command line activated screen capture tool. The ease of Linux systems and the pi is that the installation for new things, like Scrot, takes a single command (technically I updated first, but that’s the first thing to do for pretty much new application). Then from the command line I can take a full screen capture by typing “Scrot” while the “-s” modifier lets me select portions of the screen to grab.
Setup VNC to remotely control the Pi
Because the later steps handle the video stream there is no inherent need to open a VNC server. 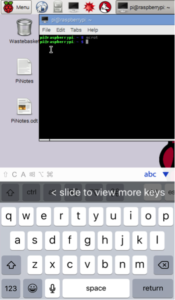 However there is a risk of sudden power downs if the battery pack (or solar panel pack) runs out of juice. In general it is nice to be able to access the Pi remotely. I prefer the GUI of a VNC server to the command line of a SSH connection. It also allows access from a smartphone, which makes it a good work around.
I started a vncserver and double checked my IP address (using “sudo ifconfig”) so that I could switch among all of my computers and mobile device and still access the pi. Check out the post on how to set this all up for a VNC server.
On the right is a “view” of the VNC server running on my phone. Everything appears the same and the terminal is working which is great for remotely running updates. Now I can update and install things so long as I’m attached to the same wifi network, and presumably I can do it from another network though I haven’t really tried (some setting is different, not sure which one). Still the streaming program later sets up a local web server which limits where you can access things from so I have no real need to jump around. From a security standpoint it makes it slightly safer to not openly broadcast the video stream or the VNC server but there are some upsides to setting this whole thing up so you can access it remotely.
Attach and Setup a Raspberry Pi Spy Camera
Cameras for the Pi are mostly plug and play. Some non supported ones, which may be much cheaper, will require a bit more tinkering but for the Spy Cam I just ran the documentations suggested script, all of which can be found here.
Now that the pi is actually able to take pictures and video the next step is to preview these or control the setup remotely. Using the VNC player I can run the same command line tools that activate the preview of the player and take pictures. The only issue here is that the preview window of ‘raspistill’ does not show up in the VNC player, instead it will show up on any connected to a display plugged into the HDMI port of the pi.
It is possible to take a picture via the pi and then open the file for viewing, all over VNC. If you are typing and clicking around that’s two separate command line entries so the delay is a problem. At the very least a command line entry can also be used to open a file so there has got to be a way, even with a slight delay, to take a picture and then immediately display the picture in a separate viewer. Some examples exist online of simple programs to do just that as you will see in the last step below.
Power supply to remove tethering for Raspberry Pi 3
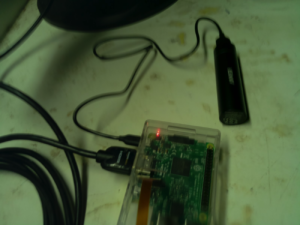
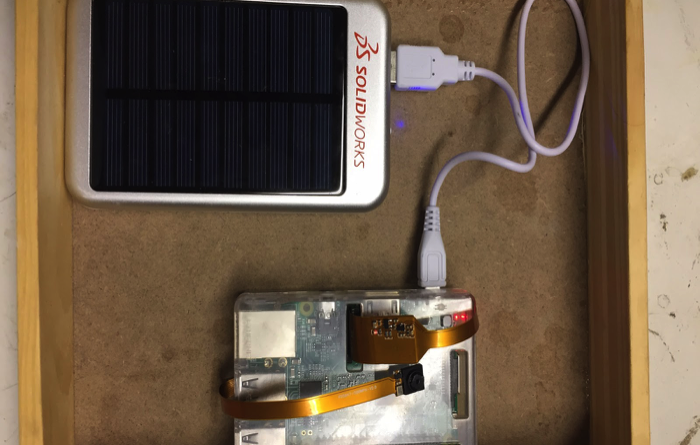
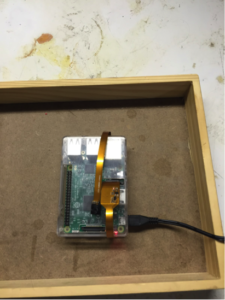
While testing I kept the standard pi power supply connected and plugged in but the goal is to make the setup wireless. This means adding some external power supply. I happen to have an Anker Powercore+ mini laying around, it was a giveaway at some conference. The small system has usb and miniusb in/out port and came with a cord while also supporting up to 1A of output current and 3350 mAh capacity. That’s plenty of power since I only need around 650mA (.65A) to run everything via SSH or VNC and even if I want to directly connect to it for troubleshooting it’s still only 850mA (.85A). The image below is taken by the camera while it is being powered by the battery pack.
Total power draw during the capture of this image is (roughly)
- Pi Board – 400mA
- Camera – 250mA
- Mouse – 50mA (varies by model)
- Keyboard – 100mA (varies by model)
- HDMI Out – 50mA
The one issue here is that I have no idea if the power supply is about to fail in headless mode. There is a green light on the battery that turns red if it falls below 5% capacity, but if I’m not physically able to see the power supply this is useless. I could use that same battery board and light to trigger something on the GPIO pins, but for now will plan to just keep an eye on things and attach to main power supplies since even conservative estimates would suggest I’ve got at least 5-6 hours of battery life from a full charge.
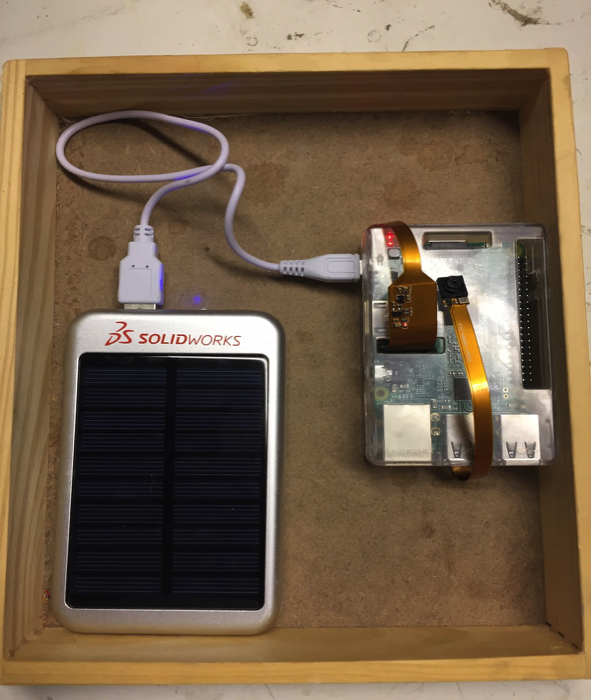
Add solar power pack to Raspberry Pi 3 build
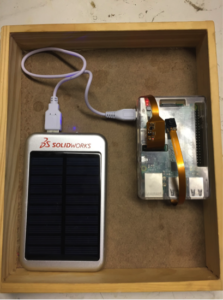
 Another giveaway at a conference a while back was a solar panel power bank with a 4000mAh capacity and steady output at 5V/1A which is plenty to power the 650mA draw of the board (400mA) and camera (250mA) now that the keyboard, hdmi out, and mouse are removed. It does not have a monitoring circuit so figuring out when it’s about to power down is still an issue and the capacity is not quite enough to ensure 24 hour uptime.
I like having this for the ability to integrate it outside into some project especially if I can control the Pi to cycle on only for short periods of time. Doing that would ensure that the device never stays on so long that the battery dies, since the panel could recharge it, and allow for a long term monitor for extended time lapse etc.
Setup streaming camera from Raspberry Pi
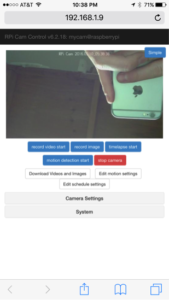
The still images and manual activation over VNC are great but my ideal scenario is to get things streaming and controlled via motion or other triggers. Again here is where the community of developers is great, there is an easy to install system that automatically sets up a web server and stream the attached camera. It only took a few minutes to run the required commands and configure everything, full instructions are here. With autoloading of the camera system enabled the Raspberry Pi can go headless and a Pi + Camera + Powerpack automatically delivers a wireless view of anywhere I decide to drop the camera up. Here is a view that it is taking of my camera as I took a few shots.
The tethered version of this is less prone to powering down and can be very discrete. I choose the spy camera because it is less than 8mm (.3in) across and comes with a sticky back that can be posted anywhere.
Even though the solar panel recharges the constant draw in low light situations can deplete the battery and though sudden crashes with the camera streaming have so far not caused any hard it is never a good idea. Through software I am looking at options that can power down either when the battery gets low or on a schedule to ensure the battery does not get fully drained.
Summary
Now that things are setup the camera can be installed wherever appropriate. Using the smaller battery pack I was able to hide the rig in the pocket of a jacket and run the camera to a button, creating an easy wearable. If you do this it’s worth trying to shield the board from any static. Alternately the rig can be mounted outdoors, the whole setup is very light so some folded over duck tape was all I needed to mount the pi and case to a wall and position the solar panel. More can be done to turn the system on/off automatically to save battery time but I’ll leave all of that up to project specific programming as it requires adding some hardware. Not bad for a few nights of work and $100 in parts.
Pingback: Pixela: Amazon Alexa with a Touchscreen and Barcode Reader for $130 – New Product Development
Pingback: Simple Raspberry Pi Tasks – New Product Development