
Pilexa: Amazon Alexa with a Touchscreen and Barcode Reader for $130
Smart home automation technologies impact the value of a home. For the real estate market this provides an opportunity. We have been considering moving into a new place and as such I wanted to get a sense of how easy it is to start making a house smart. Of course couple that with a few recent projects for the Raspberry Pi and the DIY method seems obvious.
There are a lot of Pi projects that focus for different builds. My goal is to be able to combine things like bluetooth connection, voice automation, and camera security. Personally I prefer being able to access a device directly and avoiding cables where possible, so I wanted battery power and a screen.
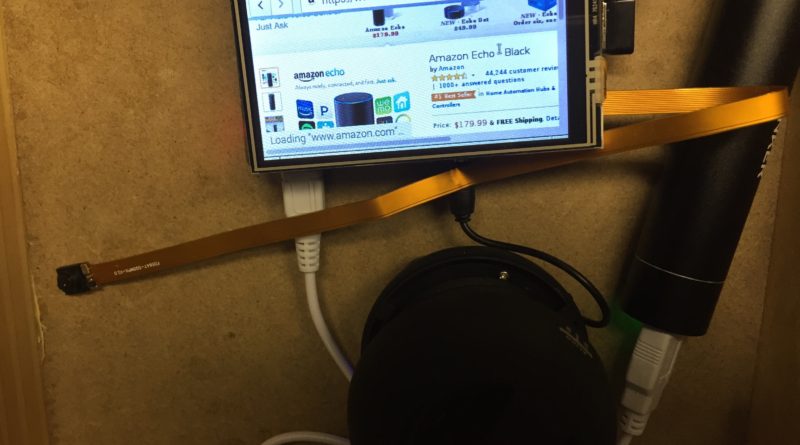
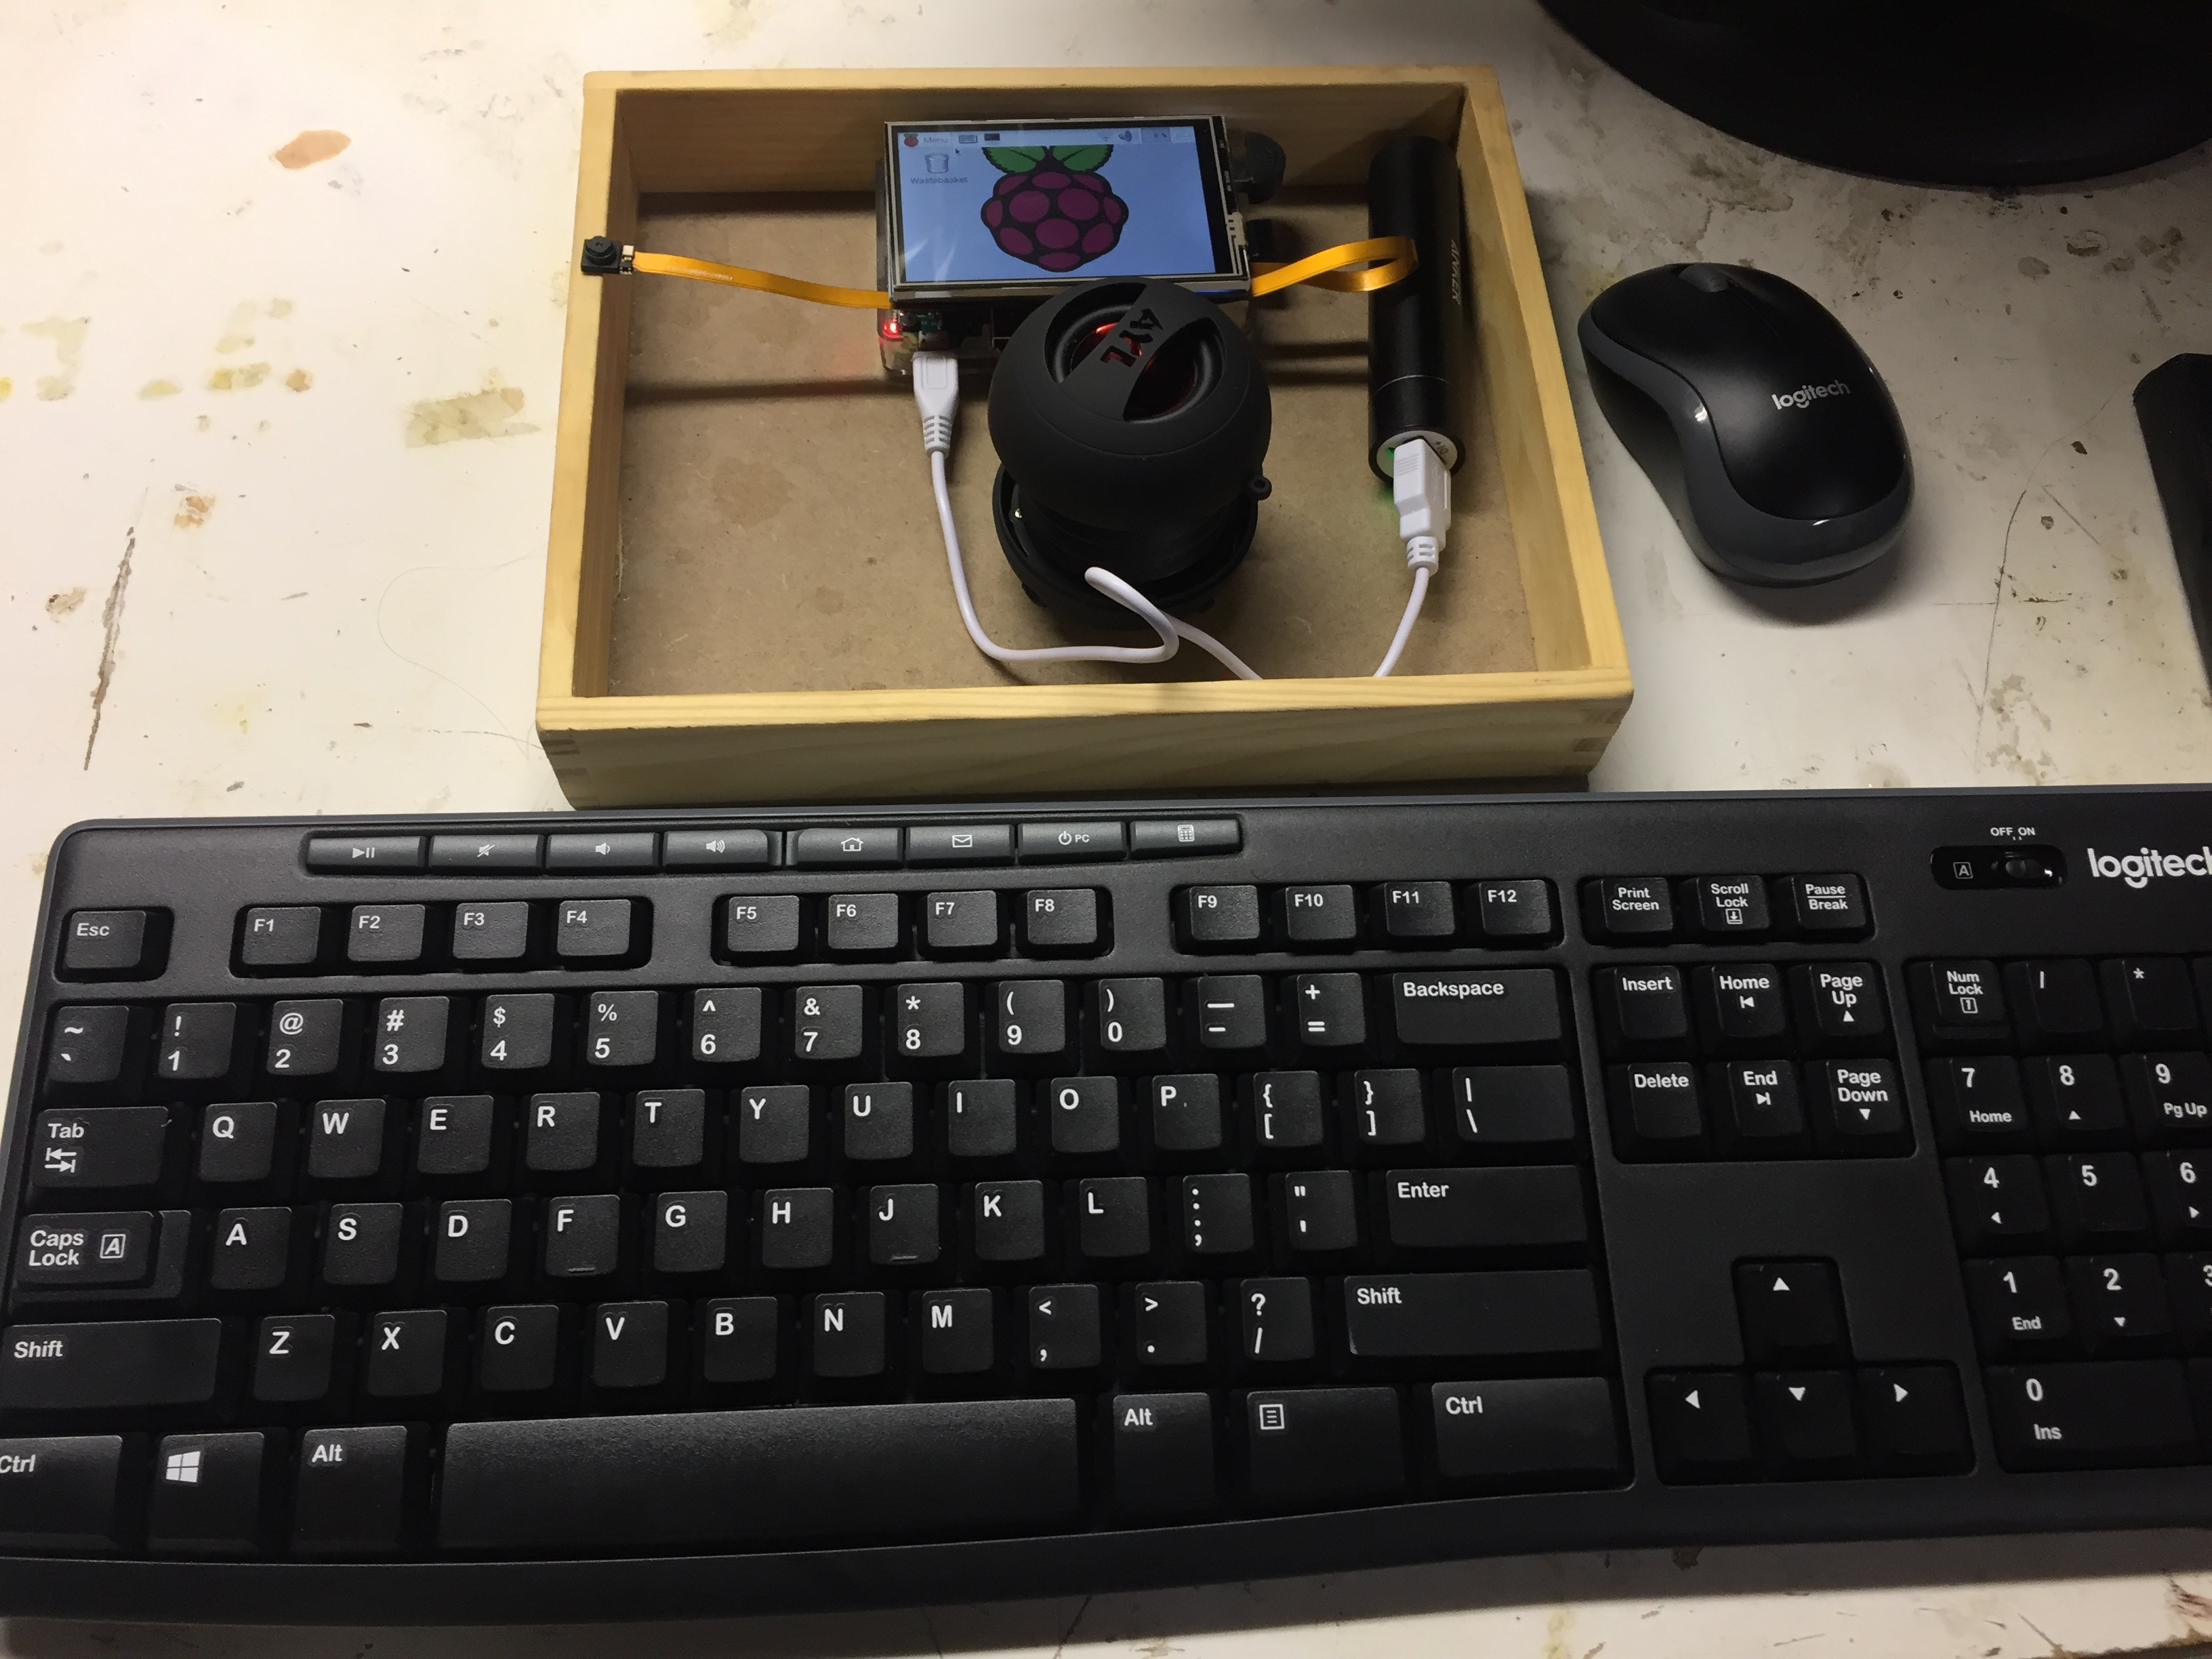
Here is a look at the current Raspberry Pi setup. This includes a microphone for voice recognition through Amazon’s Alexa for Pi. The speaker allows for playback of sounds or music, which can be streamed over wifi. The embedded bluetooth connection allows for output to headphones, or control of smart devices.
The spy camera was chosen to stick to anything and can be hooked up for simple barcode reading, and in theory face recognition (wanted that for a future magic mirror build). I also left the keyboard and mouse dongle in one port, which makes troubleshooting a bit easier even though the 3.5” screen is touch sensitive.
Lastly is the battery power. This is not ideal right now, the 3500mAh anker battery gets me a few hours, and the speaker has a battery too. Still this provides everything needed to start building the whole setup into other things.
An at home built Alexa is possible for $70. For the barcode reader, security camera and display the project creeps over $100 but still well below the $179.99 the Echo sells for on Amazon.
- Raspberry Pi ($35)
- USB Mic ($5)
- 3.5mm Audio Jack Speaker ($15)
- Battery and Cord ($10)
- 8GB MicroSD card with Raspbian Pixel and Pilexa ($5)
- 5 mPx Spy Camera ($40, optional)
- Screen ($20, optional)
If you are into computer vision the extensibility of the camera offers some unique projects including facial recognition. Building this into the magic mirror concepts also sounds like a fun next step in order to help make this a hub of the house.
Nearly everything here is “plug and play” for the average Pi user. Installing all of the Alexa software requires some access to the command line but the tutorials are easy to follow.
Overall the tricky part for me was getting the touchscreen to work since I went with a cheaper $20 version. I ended with a “Kernel panic” one time but re-flashed the operating system to the SD card and got it all working. All total it’s possible to get this setup in about 4-5 hours, including software download and install times.
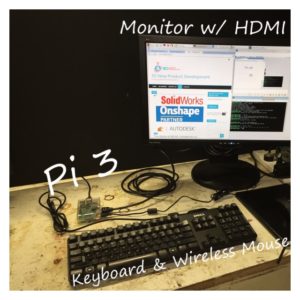 It’s worth noting too that I started out just trying to get a cheaper new computer for web browsing. That left a whole bunch of ugly cords and generally was immobile. An image of it can be seen to the left. For me the beauty of this is that I now have a fully portable device that is small enough to embed in most of my furniture, drop inconspicuously into a room, or incase into another device. Depending on what the application is there are a few areas of the existing build that can be changed and reduce the cost or expand the battery life. These options include:
- Using a Pi zero which comes at the cost of bluetooth/wifi built in
- Dropping the speaker
- Increasing the battery capacity or hardwiring the setup
- Losing the screen or increasing the size
- Dropping the camera, reducing the cost through others, or adding some type of magnification
For the time being I am focus on connected peripheral devices that have some level of automation. SmartHome here we come!