
Add Wifi and Cloud Control to a 3D Printer for Under $50
“I’m trying to understand what a low-cost solution would be to allow me to turn my USB/SD card Makergear M2 and a lulzbot taz 5 be used remotely. Actually what I would really like to be able to do is even send print jobs to it while I’m at home.”
That was the comment directed at me from a reader who is working to build out his printing capabilities. The Makergear had been working well but was tieing him to a specific location (the office) which limited his ability to start prints at convenient times. In looking for a solution a few things came up including the Matter Control from MatterHackers, which is a $300 Android tablet that can mount on the side of most printers, as well as an open source software called Octoprint.
OctoPrint or OctoPi on a Raspberry Pi to Control a 3D Printer Remotely
To get started with Ocotprint I grabbed the existing Raspberry Pi 3 and camera setup. The single board computer has built in wifi so once configured it can be attached to the printer and controlled completely remotely. A display can be added to allow for direct manipulation but will increase the total cost and since the raspberry pi can be controlled entirely remotely it is unnecessary. A mouse, keyboard, and display setup will make setup much easier.
First up is to configured the SD card that will power the system you can download everything for Octopi from their website.https://octopi.octoprint.org/
Instructions to write the .img to an SD card using the command line tutorial on Raspberry Pi are the simplest way to get running. Every tutorial on doing this points out that it is “risky” if you make a mistake, but in reality all you need to do is follow a few steps and double check you know what your SD card is called and this is easy. It takes a few minutes to transfer the 1.7GB build of Octopi to the card but then you are off and running.
https://www.raspberrypi.org/documentation/installation/installing-images/mac.md
Steps To Installing OctoPi Software on an SD Card
- Download the OctoPi .img file and unzip
- Find the disk name of your plugged in SD card using diskutil list
- Unmount the disk of the target SD card using “diskutil unmount”
- *RISKY STEP* use “dd” to copy the .img file to the card. This is risky because other disks on your system include you main operating system. If you try to copy over that you will effectively kill the machine. Double check you have the names right a few times.
https://www.youtube.com/watch?v=EHzN_MwunmE
Connecting to a Network
The build of Octopi still must be configured to connect to a wifi network automatically and a few other settings must be turned on. This can be done a few ways but arguably one of the easiest is to find a keyboard and display and do them directly on the Pi. It’s all command line entries so there is no need for a mouse, you CAN do this by remotely connecting to the Pi but that requires a manual setup of the network connection or an ethernet cable.
Put the new OctoPi formatted SD card into the pi, plug in keyboard, and monitor, THEN plug in the power supply. The Pi will boot to the command line.
Configure to attach to a wifi network automatically by altering the text file. Find your Wifi Network name and password then manually edit the text file using the “sudo nano” text editor. You can find the file and all of the syntax of what you are editing to by following these instructions
Update the Rest of the OS for OctoPi with a Camera
Enable the Camera using “sudo raspi-config”, this brings up an option screen.
Run a “sudo apt-get update && sudo apt-get upgrade” to generally make sure all is well. When installing new things on the raspberry pi this is the equivalent of “did you turn it off and on” as a lot of development is ongoing and keeping up to date ensures things are in the right place.
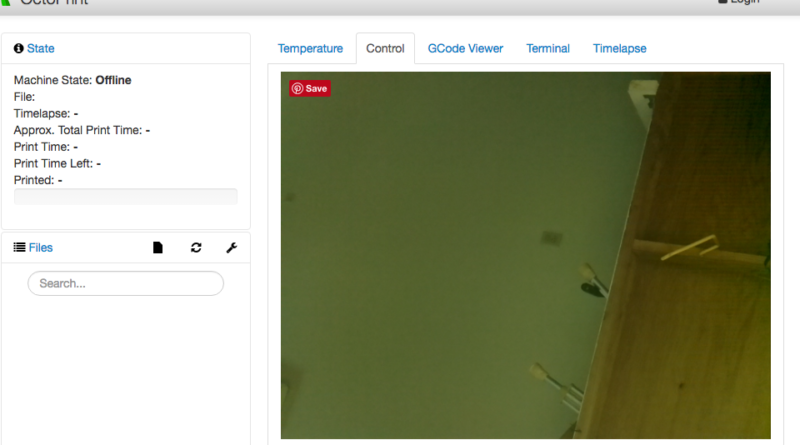
Once these are done you can reboot the pi using “sudo reboot”. Assuming you setup the wifi correctly, upon reboot the OctoPrint will be working. Pull up a web browser from from a device on the same wifi and navigate to “optopi.local/”. Even without connecting to a printer you can test if the system is working and even view a camera if it’s attached. Here is an image of my ceiling as it appears on the dashboard.
Local or Truly Remote Access of Raspberry Pi
All of this will only enable “remote” access to machines that are on the same network so from within your house or office, so not quite remote. The next step is to be able to access this remotely. To do this there are a number of possible solutions with varying degrees of security and ease of setup but most effective seems to be to do port forwarding, which effectively makes that internal link work remotely.
Port forwarding requires playing with router settings, so if you do not control the network this becomes more difficult, in which case you can use a work around including opening VNC from a local computer and then connecting to that from a remote location, but that defeats the purpose since it still requires a dedicated machine near the printer.
Forwarding is also insecure and opens you machine up to malicious outsiders. Supposedly the right google search will even reveal printers that are online and accessible. Because a printer includes things that get very hot and move, leaving it open to acess by hackers is a bad idea. The latest OcotPi .img file turns on a layer of security by default thankfully, but it’s still worth noting that even with this you are open to brute force attacks.
https://github.com/foosel/OctoPrint/wiki/Configuring-Access-Control
There are other alternatives to the OctoPi setup. In theory the MatterControl system can be run on a Linux build of Ubuntu and is opensource, so it’s possible that you can replicate their $300 system for about $80 using a Pi. This is certainly a project for another time though as it’s only necessary to control so many things at once.
Pingback: Chromium Kiosk Mode For Signage & Displays – New Product Development