
Graphics for VR – Raspberry Pi instead of Oculus Rift
For home builders and tinkerers there are some technical hurdles to various projects, building your own VR system is ripe with all sorts of challenges. With one of the major players in the market, Oculus Rift, coming out of a home brew concept only half a decade ago though it makes sense that todays home builder may be able to go much further. To do so it’s important to consider the capabilities of easy to access materials and the thresholds at which VR experiences are workable.
After experiencing VR for the first time in a full room setup I was eager to explore other applications. The Google Cardboard offers a low cost way that at least leverages the accelerometer of a phone without any additional lifting. Still, even things like an iPhone pale in comparison to eh graphics requirements of immersive VR. Any review here of the requirements would pale in comparison to the folks at Logical Increments who advise on all sorts of hardware builds (not just VR). There major area of focus is on the graphics processing and display qualities. A bad experience in VR can leave a person nauseous and dizzy and low frame rate display with jumpy video make this even worse.
The Oculus Rift and HTC Vive setup both require a minimum of 90 frames per second display from any new apps. Below 90 feels fake, causes illness, and generally ruins the experience. Higher can make things better, though according to a few sources the human eye can process up to 150FPS, over which the extra detail may be subliminal but is not consciously perceived.
Raspberry Pi Displays for VR
The obvious pursuit of VR with a Raspberry Pi is to build some form of viewer. Graphics processing is one thing, and it’s unlikely that a Pi can handle the higher end of rendering but some of this can be worked out. My concern was mostly for the output display capabilities and if it had the resolution and frame rate display capabilities required to generate an immersive experience assuming there was a simple pre-canned environment (as opposed to a walk around immersive one that requires graphics processing resources).
There are a number of options for displays from the Raspberry Pi. One of the more common ones is a 7″ touchscreen. Physically this is matches the dimensions of the first developers kit for Oculus Rift which shipped with a 7″ screen, and is slightly larger than the 5.6″ display of the very first prototype. However the resolution of the Pi touch screen is significantly lower and comes in at 800 x 480 pixels and delivers 60FPS which again is below the 90FPS that seems to be the human cutoff for causing nausea.

Also available are higher resolution HDMI output that can reach up to 60FPS, but again still below the required minimum. This doesn’t mean it impossible to get a VR environment, just that it is not ideal.
Of course there are higher end displays, some users have gotten up to 4k displays albeit with a 15FPS frame rate. Ultimately the most elegant solution is to dedicate the HDMI output to the highest grade screen possible and then use an existing developers kit, like the Oculus DK2. One industrious blogger seems to have the basis for this going over at the VR Zero which uses python on a Pi to deliver a VR experience.
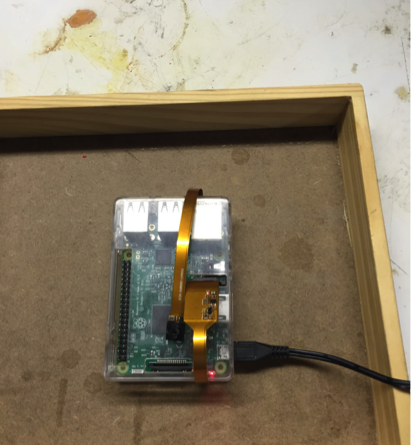
Raspberry Pi Spy Camera for VR Scanning
The alternative to a display unit is a VR capture or creation system. Most VR environments fall into one of two categories. The first is a fully designed world, similar to existing 3D gaming world, and that’s what most of the high end graphics requirements are needed for. Second is a 360view of an existing world, which can be pre-canned and lowers the graphics and processing requirements of the hardware. This is good for “traveling to new places” and is popular thanks to Google’s street view and 360 camera rigs that can capture a stationary view of an environment. It’s this second option that is fairly straight forward as an opportunity for a Pi application using some of the simple camera components and the ability to mesh together images.
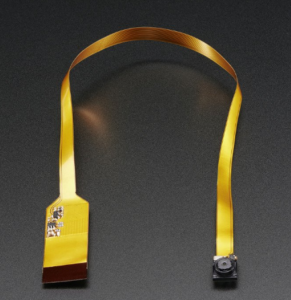
The camera attachments for the Pi vary, but I started with one Sold by Adafruit. Resolutions details are below, this does not have enough capacity to capture for 3D video for an individual view. It does have the power to capture still images with high enough resolution, so it’s possible to consider multiple static images stitched together to create a 360 view that can be explored. This opens up the options for multiple Pi’s to be threaded together or just using one camera view to get a full look.
Published and supported specs for the camera are:
Static Images:
- 2592 x 1944 pixel
Video Support:
- 1080p30
- 720p60
- 640x480p 60/90
For capturing this is again not quite fully ideal, but with the right configuration it can be pretty good. Thanks to the low cost of the Pi, and Pi Zero it’s possible to rig up multiple dedicated boards and cameras to capture a wider field of view and through the right scripting, again in python, the images can be combined into a complete world and output directly. A few redditors seem to be headed down this path with some projects and it is certainly one area I’ll be keeping an eye on.